

Here’s the beginning. My usual skeleton of wire covered with chenille stems so that the wool has something to stick to. He started out quite tall, but if I remember rightly I took some length off his legs— either that or he shrank with age as he is now only 11 inches tall in his finished form!

After wrapping with the white core wool, I covered him with “Latte” wool for his skin. This is the same color as Nieva, the heroine of my story. He looks a little strange and misshapen at this stage, but that improves with time and effort.

Here he is with his face mostly worked. I gave him a bald head — but plenty of hair at the back. Story of old age really — hair in all the wrong places! ;) He still looks a little strange as he as no eyebrows/eyelashes. I had to wrap him in a temporary cloak as he was embarrassed standing naked in the shop setting. At this point I also realized that his hands were absurdly small - poor guy.

He looks a little more characterful at this point. I gave him a mustache, beard, eyebrows, and eye definition.

Now my Apothecary needs some clothes. I started with a rough sketch of what I wanted to make. I’m obviously not a fashion designer, but I had looked at some olde fashions online and there is enough info in the sketch for me to decide what to make. I already had some fabric that I bought as a little packet in Hobby Lobby and I picked out a mustard color for his pants, white for his shirt, and a blue for his coat.

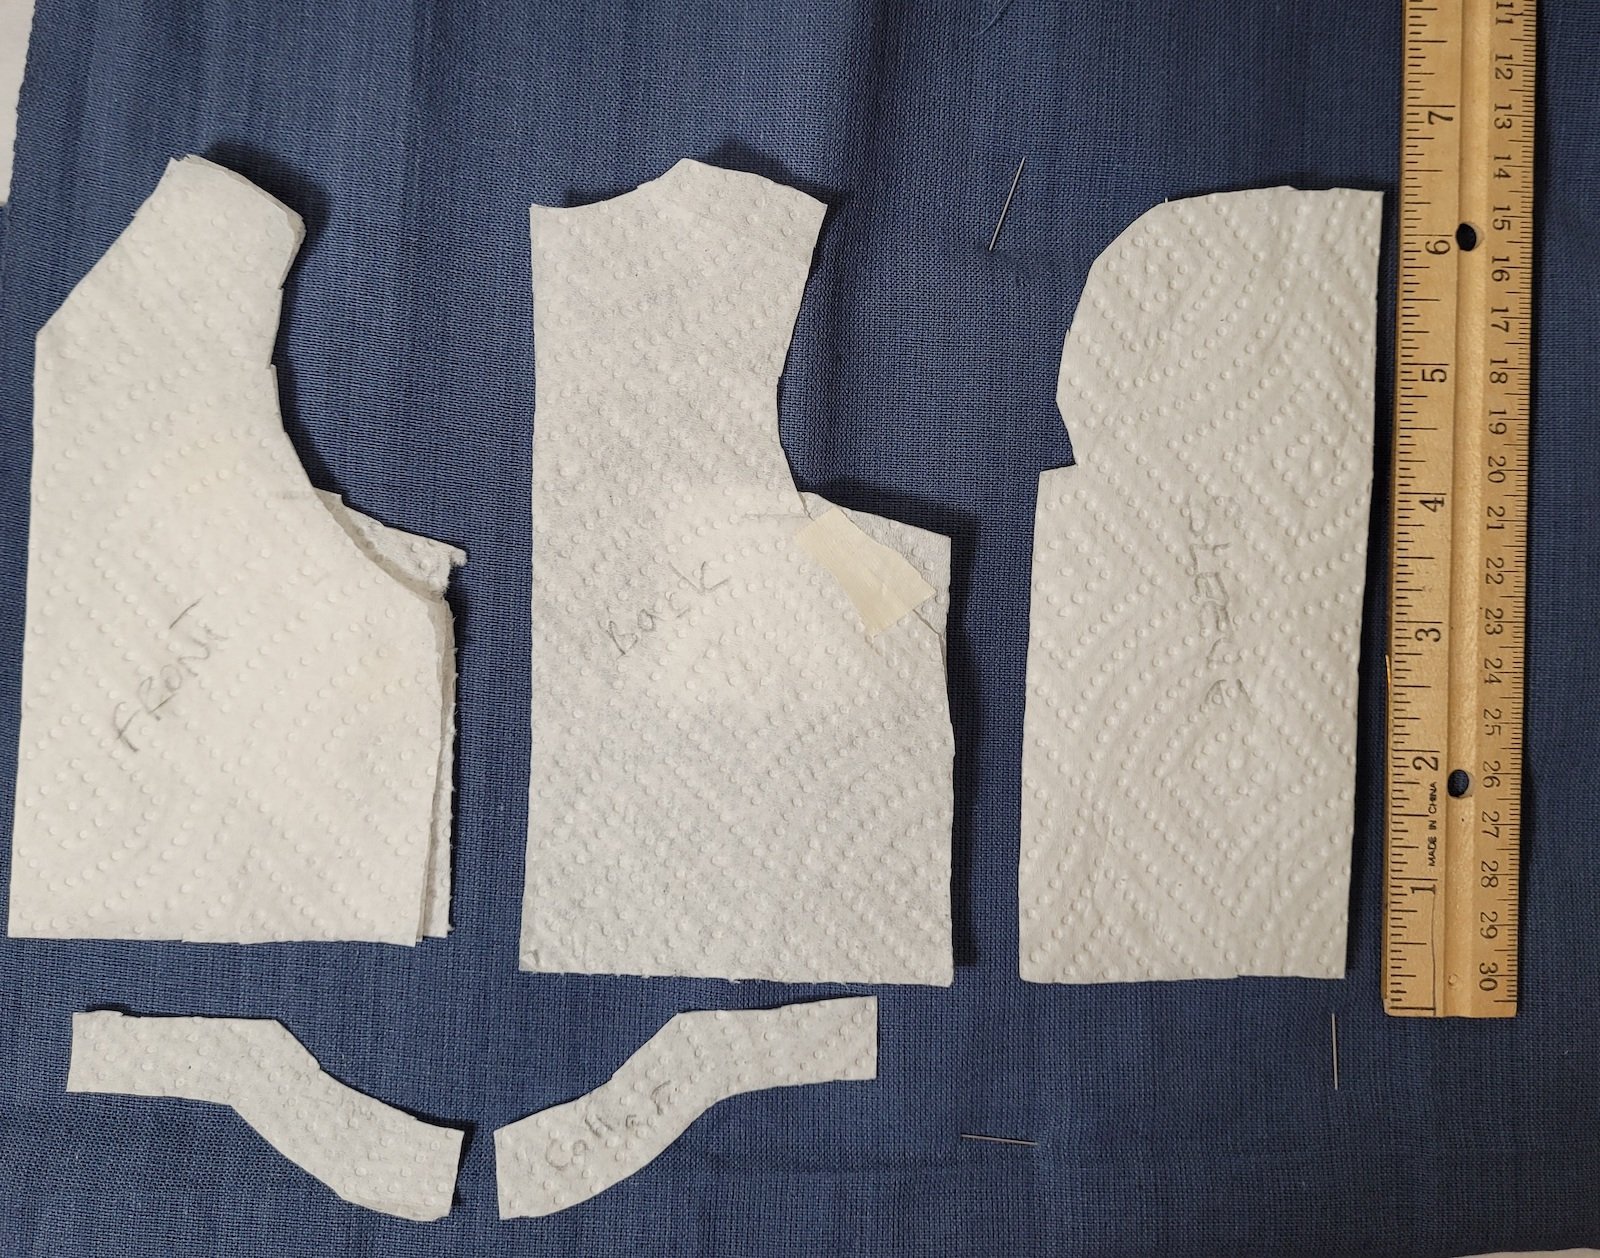
I made a pattern for the pants first. I use sheets of paper towel to wrap around the body and draw on, then cut out. Then cut out the fabric and start hand sewing the pieces together. I hand sew because it’s quicker and easier than setting up my sewing machine for such small pieces.

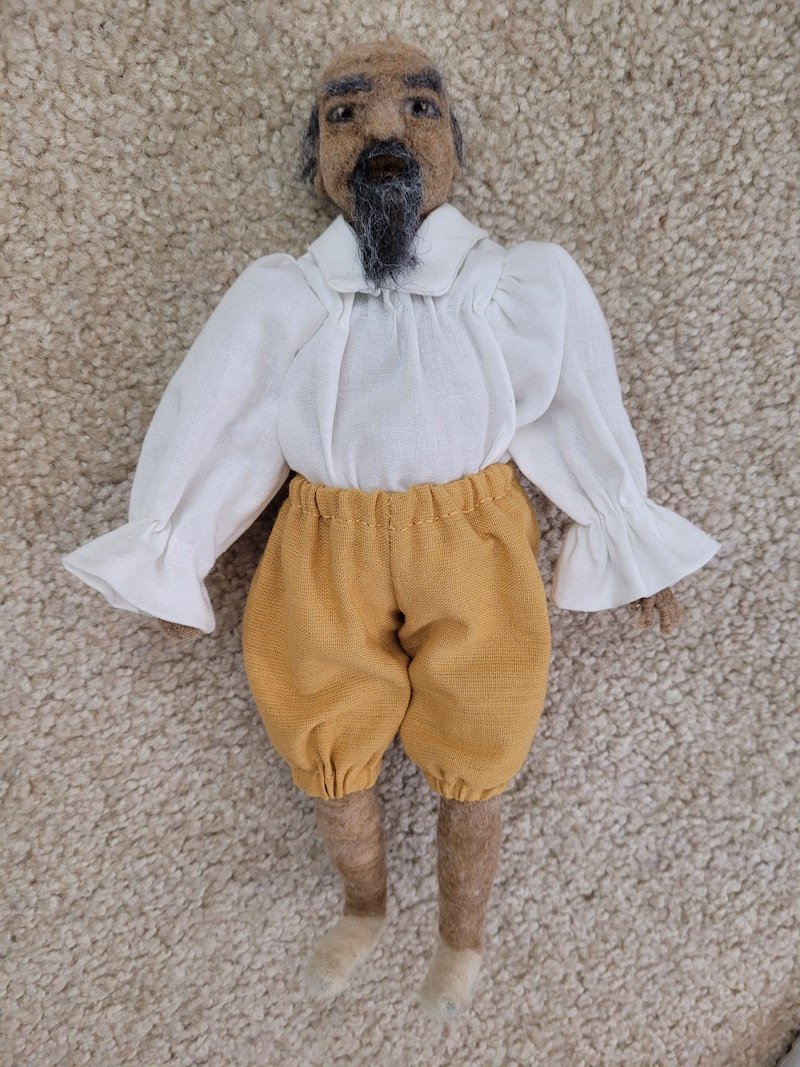
I used some elastic in the waist of the pants so they would be easy to get on. He still looks a little perturbed, and who wouldn’t - standing in a shop half naked is the stuff of bad dreams!

I finally understood what his problem was. He didn't feel quite complete — he wanted chest hair!
On to the Apothecary shirt (which annoyingly enough is going to cover up the magnificent chest hair. Humph!) Again I made a pattern. I laid it out on the blue coat fabric so that you can see it, rather than on the white fabric the shirt will be made from. Part way through making it I decided to add a collar, so I had to work out a shape for that too. I have to say that my clothes making is not very precise, I guestimate and adjust along the way. Each item I make is a learning curve, but it seems to work out in the end. To my satisfaction anyway.

I wanted the sleeves to be puffy at the shoulders and elasticated, with flared cuffs, so I had to experiment with the sleeve pattern a bit to make the fabric big enough. I also wanted some gathering in the front of the shirt so that was made pretty large too. I had to buy some especially narrow elastic to do the cuffs with. I folded them double and made a channel to put the elastic through. It was very fiddly, but worked out pretty well.
Here’s the shirt on.

Here’s the shirt back. I didn’t do any fastening at the back because it will be hidden by his coat and tucking it into his pants holds it in place.

At this point I decided to replace his pathetic little hands, so I took some scissors and cut off the wool, unwound his finger wires and started over. Not for the squeamish! He looks like a pirate now.

Ta Da! Edward Scissorhands! Oh dear, it’s quite gruesome, and you can see that I went from one extreme to the other. I struggle with the hands. It’s not easy to gauge how big they will turn out and they are the very devil to put wool onto. Sigh. I should probably spend a week just making finger templates and hands of various sizes for future reference. Anyway, now he has functional hands that can probably tear trees in half!

In this pic you can see that I worked on several things. First I gave him some leggings below his pants in a matching wool. I also added a bit of tiny lace to his shirt collar, which really gives it some finesse. The lace was left over from when I had cut up some wide lace to make skinny waves on the ocean for my merfolk cavern, all that long time ago. This little bit of trim was just perfect. You might also notice that he has glasses. In a mad moment I thought I haven’t really done enough super tiny work that will give me a headache and sore fingers so let’s try and make apothecary glasses out of 24 gauge jewelry wire. I don’t recommend it — but now he has them and he can read all those tiny labels on the apothecary jars.

Once I’d made the glasses I added some drops of Gloss gel to make the actual “glass”. This is quite effective and I’ve used this a couple of times for making magnifying glasses for my other character Zahrah. I taped the glasses down onto freezer paper as the dried gel will peel right off that, sticking only to the metal frame.

Here’s a picture of Zahrah with her hand held magnifier.

Back to the serious work of the apothecary coat. This is not a coat in traditional terms, but a “surcote” a long, sleeveless, outer garment, often worn by soldiers over their armor in medieval times. (Amazing what you can learn by making clothes for a doll.) This pattern was the simplest. I cut the back piece on the fold, and the front sides separately.

When last in Michaels I bought a trim bundle that I thought would surely come in handy for the Apothecary clothes. Here you can see the coat pieces stitched together and hemmed at the armholes. I didn’t worry too much about the look of that as I knew it would be covered by something or other. I picked through the trim to find something I liked.

Here you can see the fairly neat finishing I did on the inside of the coat (?!) I know, makes no sense — well, actually it does. Because of the nature of the coat it falls open and the inside can be seen. The fabric frays quite a lot so I took the time to turn the tiny excess seam fabric over and fell stitch it down. (One of my youtube favorites is Bernadette Banner and she does a lot of felling so I was quite thrilled to be able to do a little myself, although not up to her quality you understand.) This gold trim was what I picked out initially for the coat trim

I decided to make the Apothecary a cummerbund to hide the elasticated waist of his pantaloons and make him look a little wealthier. I chose a broad gold trim from my bundle. Then when I put his coat on and tried trim against the whole outfit I decided I liked the white and gold trim on the right.
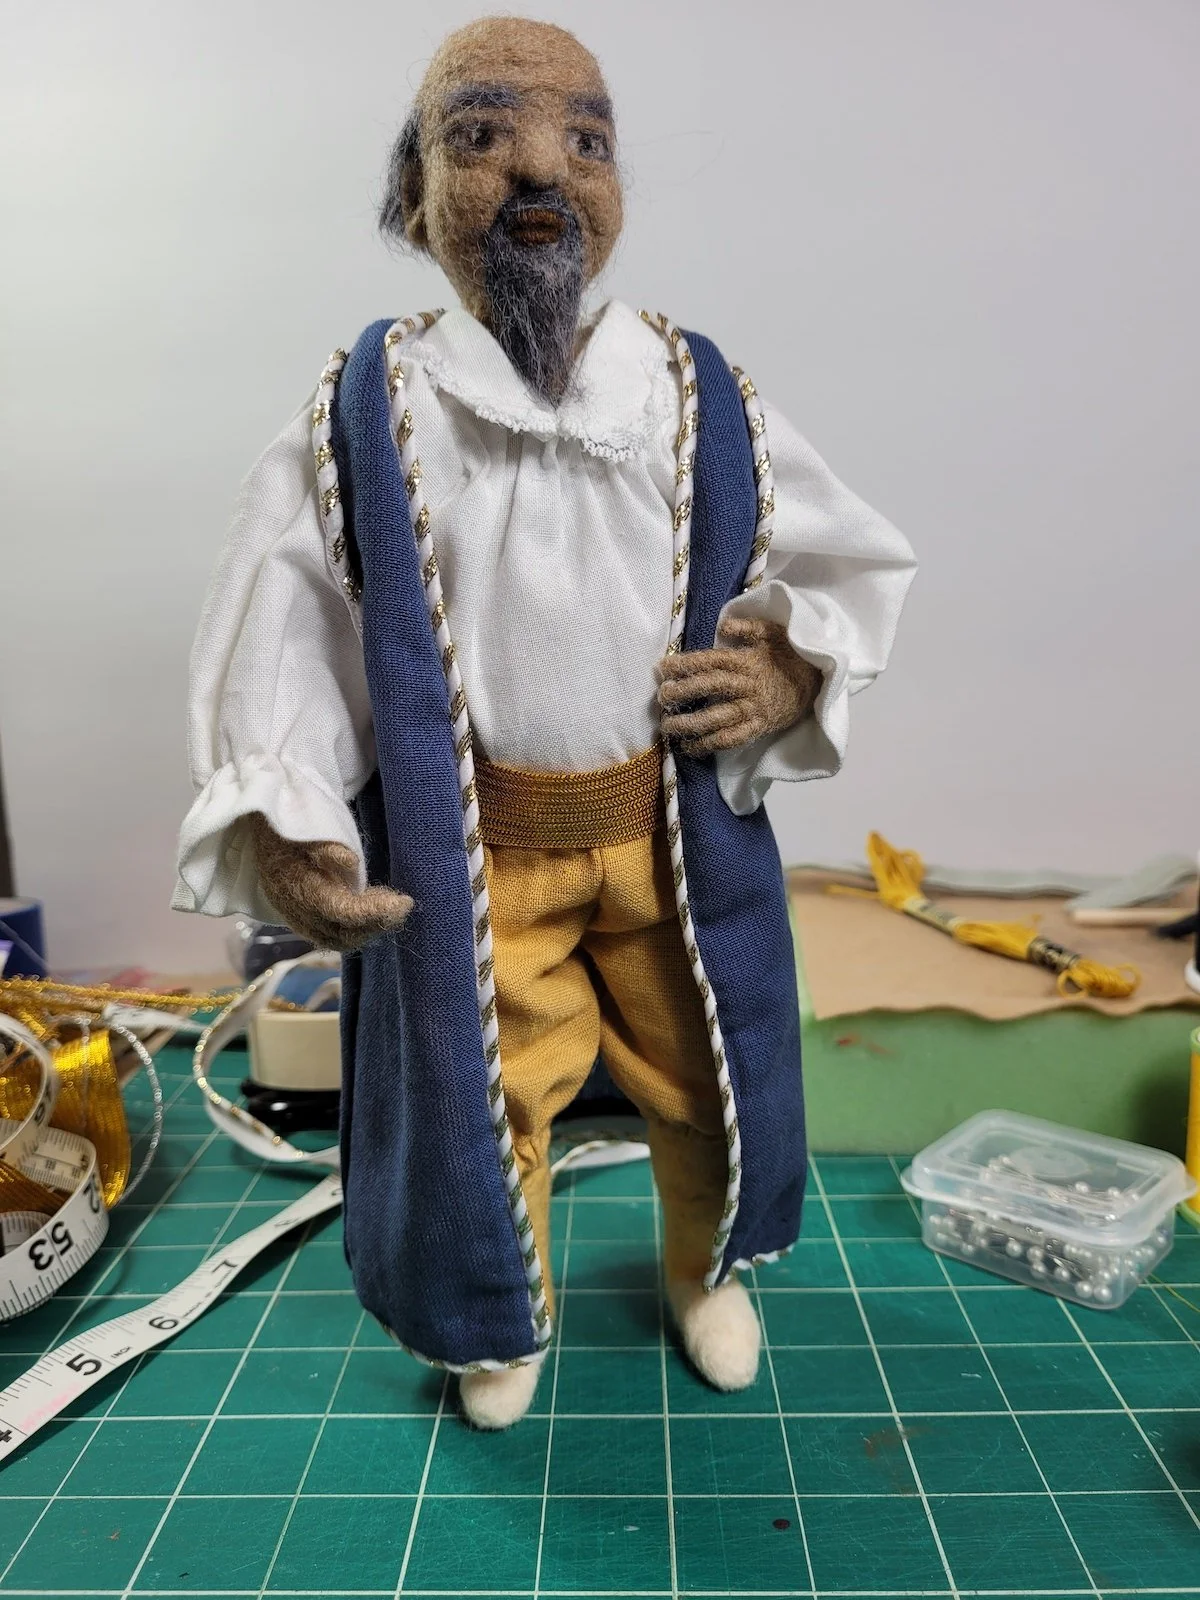
So here is the coat finished. After applying the trim to the coat I thought his cummerbund was a little gaudy, so I found a slightly narrower ribbon in a gold that matched the coat trim and added that over the top of the original gold cummerbund. Esmun is fairly happy with his clothing so far. Now on to shoes and a hat…
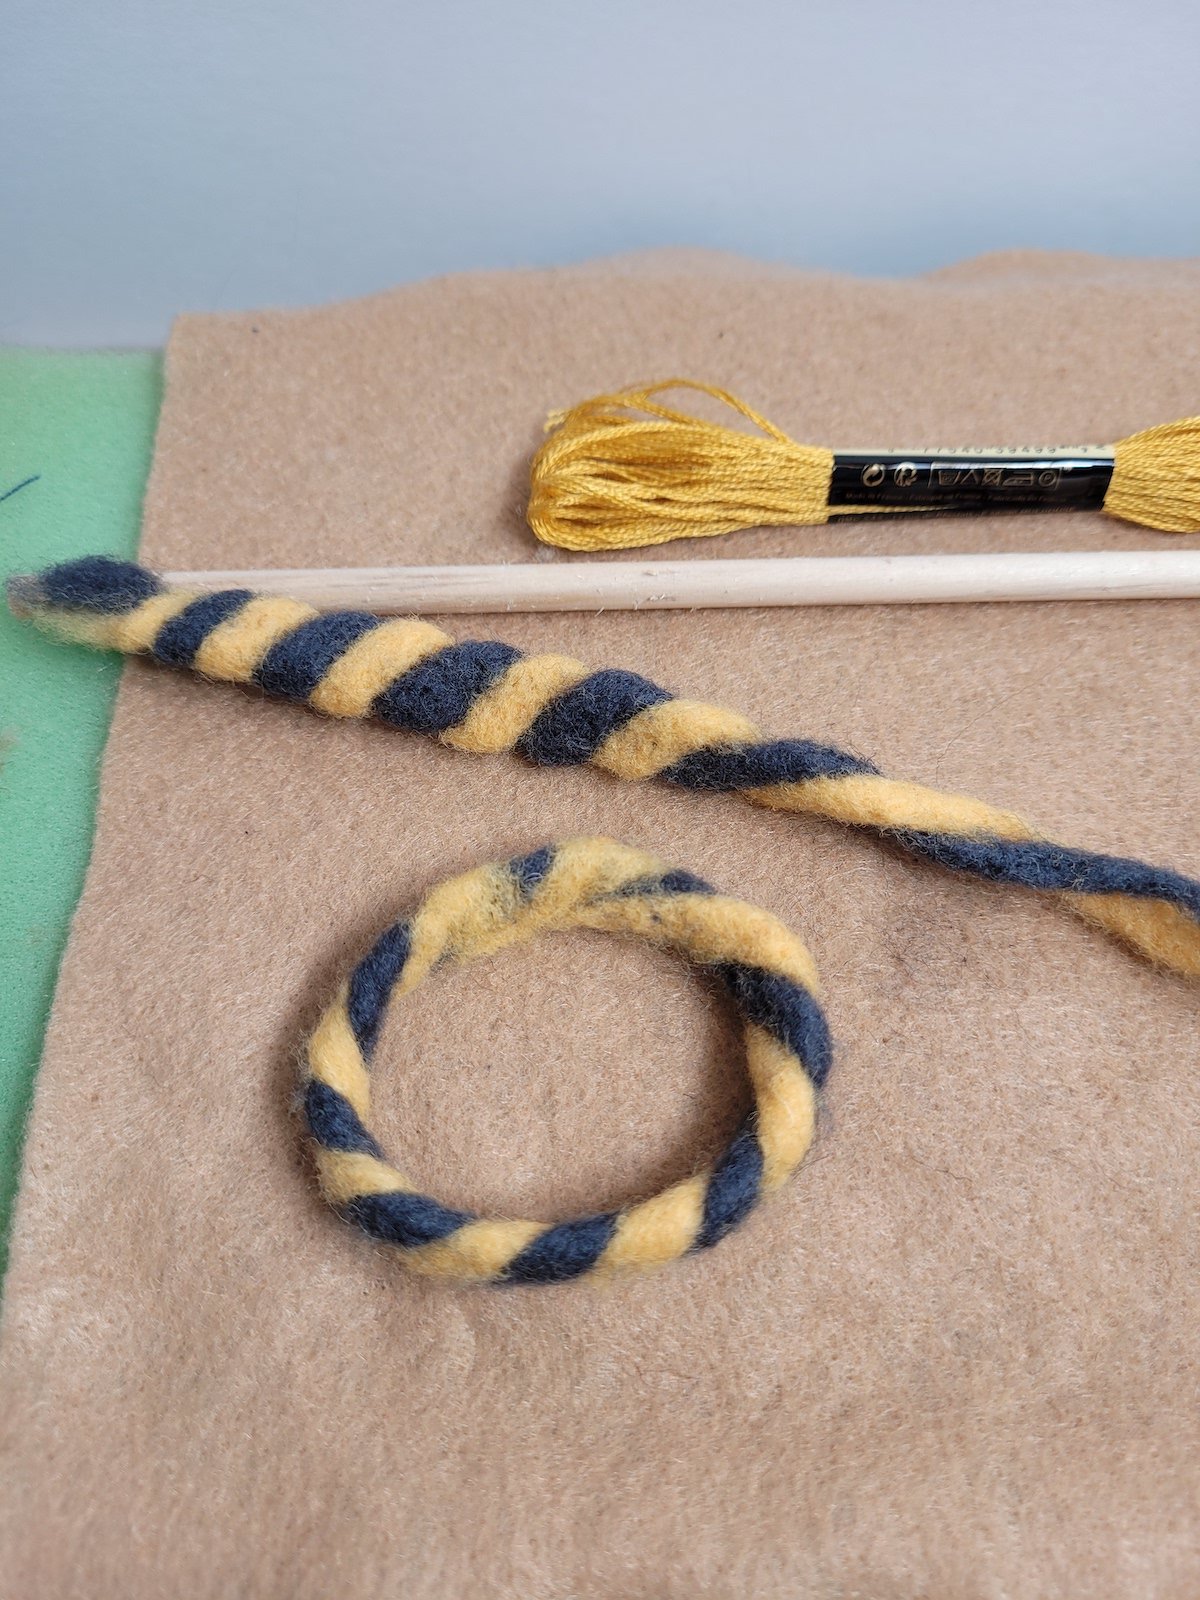
When I envisaged the coat I wanted to make raised shoulder edges that were gold and blue. So I made this piece of wool trim by taking a section of each color wool and twisting it into a skinny sausage. Then I twisted the two colors together over a dowel. Unfortunately they were not easy to felt together and I ended up with two short sections that kept coming apart. They were unsuitable for the shoulders of the coat, but I thought they might make an interesting hat band.

Looks like a good start to a hat…

Having made the hat band the right size, I took some slate blue wool and felted it into a flat circle of fabric and secured it to the hat band. It looked a little plain so I added a couple of strips across the top and a bobble in the center.

Definitely looking the part now.

The shoes I started with a flat piece of felting, again in the slate blue. When I wrapped the bit of fabric around his feet they looked a lot like slippers, but I decided to go with that. I had a piece of trim from my Michaels bundle that had fancy shapes cut into it, and they looked a bit like buckles to me so I cut a couple and sewed them onto the front of the shoes for decoration. I think that elevated them from slippers to, well if not exactly shoes, then fancy slippers!


So here is Esmun - looking very pleased with himself! Just a note on the name - it’s a variation on Eshmun, Phoenician god of healing. Appropriate, I thought, for an Apothecary. I hope you enjoyed this journey of creation.