

I had to make a lot of books, and was feeling lazy, so I used pieces of foam board for the book interiors (top). They look functional on the shelf, but are not as impressive, or as fun to make, as the more “realistic” ones I created for Zahrah’s cabin which have actual pages in them. I may go back and make some more proper books when I have time, but for now these “fake” miniatures will have to do.

With all those books I now needed bookshelves to hold them. These I made from the same little wooden dollar store trays that I used for the Apothecary Shoppe shelves. I went through the identical process of putting a nice paper in the back of the trays, then cutting wooden shelves and gluing them in.

I faked some little cupboard doors on the lower part of the shelving and used paper brads and bits of wire for handles. I also added some pieces of thin wooden dowel to trim the cupboards. Next I repurposed the shelving unit from Zahrah’s cabin (left), changing the color from dark brown to cream. Those corner shaped metal pieces I tried to use on this shelving, but decided they were too clumsy looking. I love them and I will find a use for them one day!

I had a cute little gold colored box that had contained chocolates, and made yet another bookcase by adding some card shelves and little wooden legs to it. The legs look ok, but being narrow this little bookshelf likes to fall over at the drop of a hat and I have lost count of the time spent re-shelving those darn books! I should glue them all together really…

I came across two small candle holders on sale for a few dollars and immediately envisioned them as stone plant holders, like the garden ornaments grand mansions have out on their patios. I definitely wanted them for either inside or outside my library room. I was going to make some little leaves and flowers to go into them, but actually found a miniature garland of leaves in dollhouse supplies at Hobby Lobby, and then searched for some other tiny plant stuff to go along with it. These little pom pom type “trees” were perfect, and I found some tiny white plastic flowers that I could cut up and use too.

Here is a finished urn — I think it looks like something from a manor house!

My library will have wooden floors, so I thought it might be nice to have a little rug for Nieva to put her feet on while reading. I decided to try wet felting a rug. I’ve done a little wet felting to create my own fabric for dragon/pegasus wings etc, so here was another excuse to practice making felt.

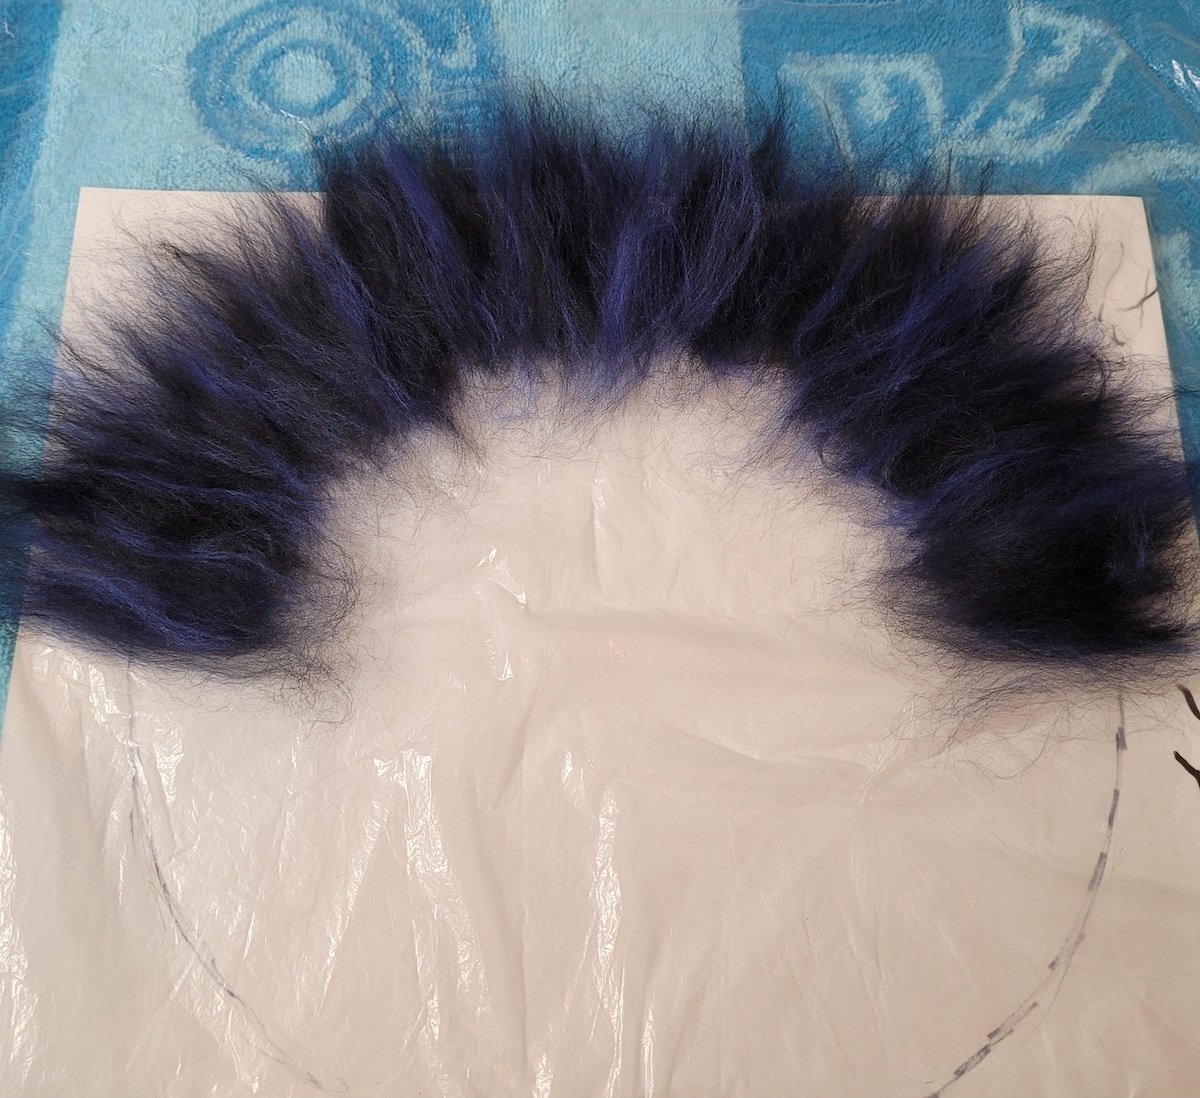
To wet felt wool, you first start by laying out your dry wool in thin layers. Here I made a circular pattern. I recently discovered a type of wool called bamboo top which gives a nice shine to finished felt so I used that for the green and blue areas. The next stage is to cover the dry wool with mesh, and then wet the wool with soapy water gently pushing out the air with a wet sponge and making sure not to move the wool out of place. Once everything is wetted down you gently agitate the wool with your soapy hands to get the wool to felt together into a fabric. It takes a bit of time and patience.

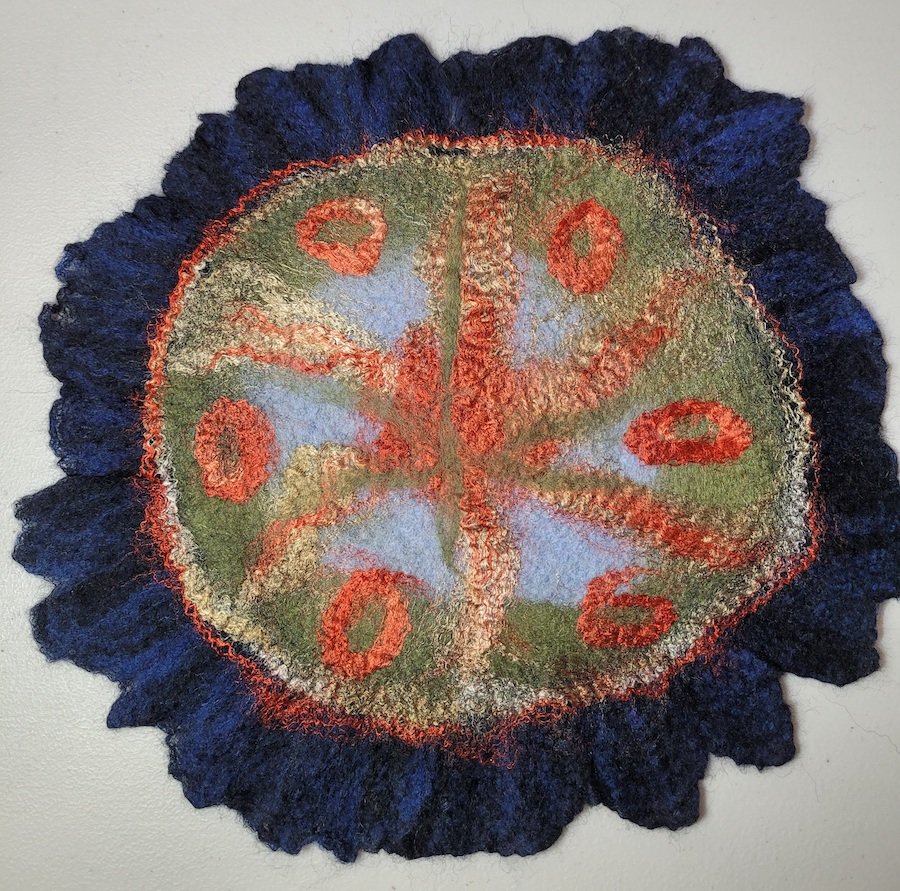
After felting, rinsing and drying - here is the finished rug. It turned out not quite circular, but I actually like the random wobbly edges of hand felted wool. In some places the wool was a little thin - I obviously hadn’t done a good job of making the layers even. That aside, I was quite pleased with the rug, but I decided to have another attempt using a different color scheme.

Here’s my color selection for rug #2. I used Merino Top (fine Merino wool, very soft) in green, pale blue, black, and dark blue. Then the far right scarlet/beige wool is my bamboo top which will add a pop of color and sheen.
I started laying out the border of my circular rug by blending the black and dark blue. I filled in the middle with green and light blue.

On top of the base colors I added the bamboo top, which will create a shiny pattern. At this point it I realize it looks more like a wooly pizza than a rug, but I’m going with it!
After the wet felting process and drying here is the finished “felted fabric”. You can see the rich color I got in the border by blending the black and blue. I deliberately made the dark edge wide so that I could trim it if necessary. I haven’t figured out how to keep things perfectly circular and I actually like the uneven edges, but ultimately did trim them down.

Here’s a closer view showing the sheen of the bamboo top, and how “crinkly” it looks when it’s felted. I love the process of making my own fabric — albeit on a very small scale. The rug has a 10 inch diameter.
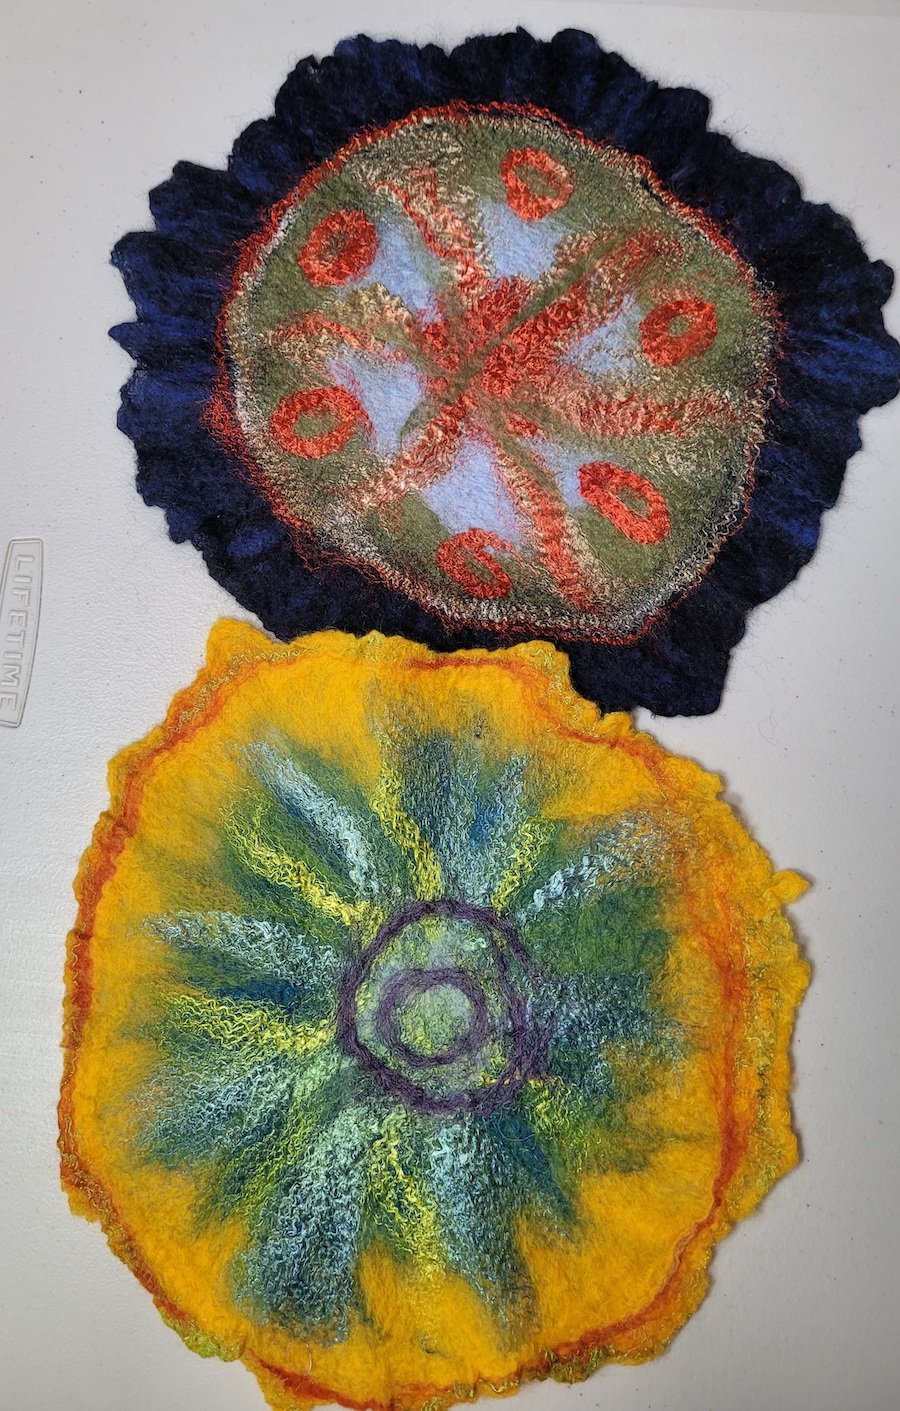
My two rugs side by side

While shopping at the dollar store I had found some cute little lights. These have tealights in them and a lovely oriental looking cutout front. I decided to use some of these for my library. I added a finial to the top to give it a more finished look, and then put it onto a small box (also from dollar store) which I decorated with wooden cutouts.

Next on the agenda was another sofa, something comfortable and less formal than the chaise. Using fabric from my stash, I made a little mattress type base for the sofa 10 inches long and 6 inches wide. Looks like something you could fall asleep on!

For the back and arms I sewed and stuffed a fabric “sausage” leaving space to bend the sausage to fit the sofa base. It looked ok, but I thought it was too low. But hey, amongst my many crafting supplies was a perfect sized gift box which I used as a base for the sofa. This raised it up to a good height.

Here’s Affie giving the new sofa the seal of approval. Yes, it’s very comfy!
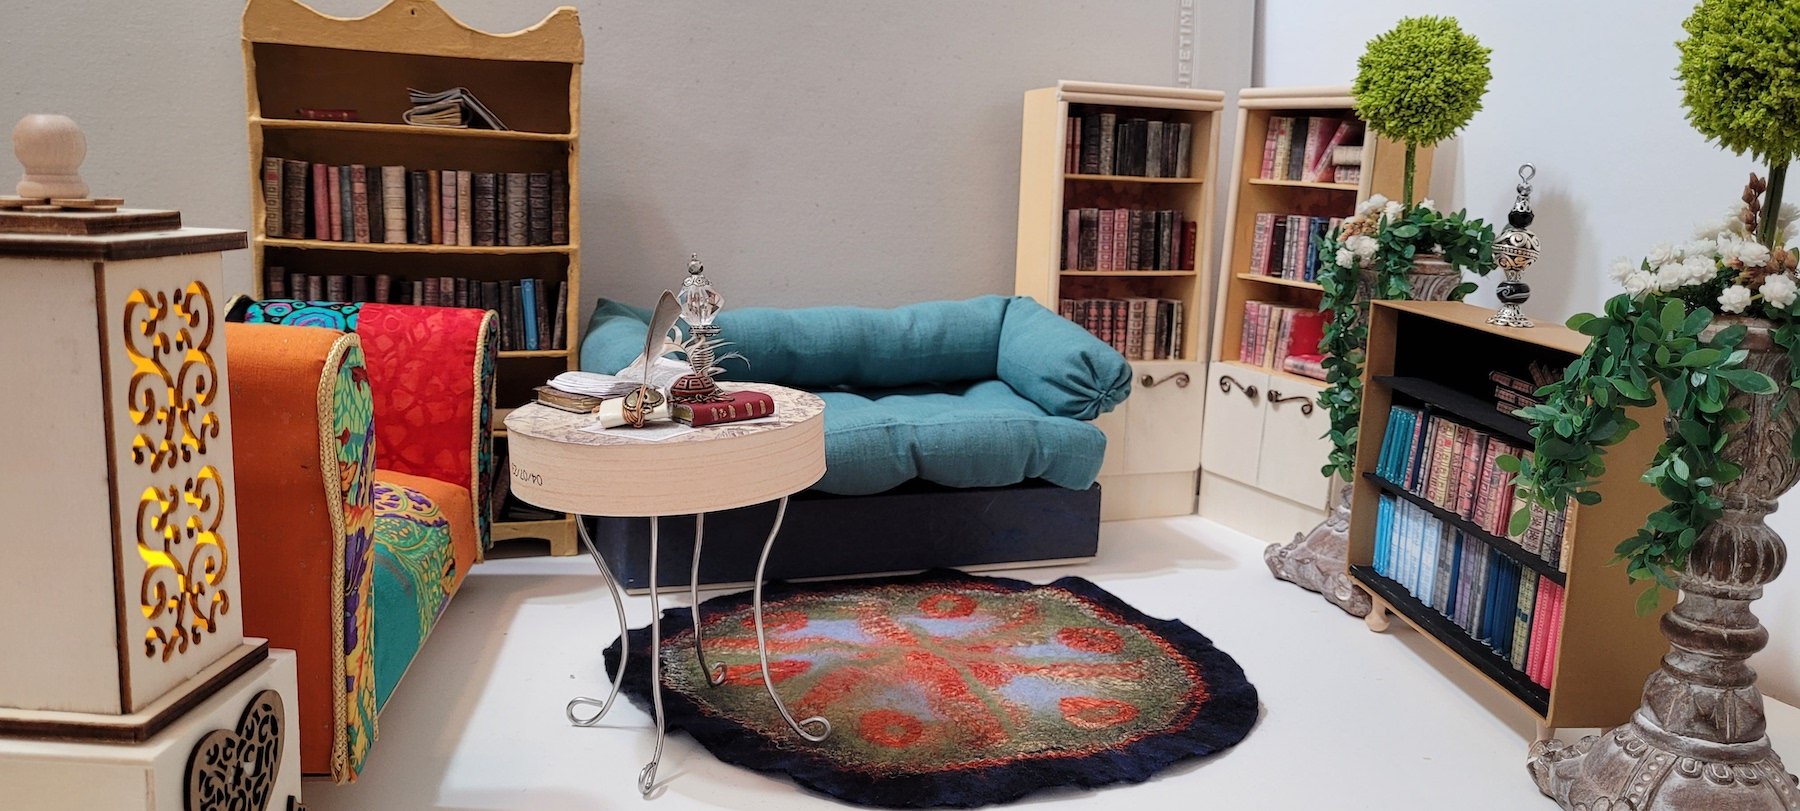
Finally, here’s all the furniture I’ve made for my library so far. You can see how fun the light looks with the tea light lit up, and notice that I trimmed the rug to be more even on the edges. For my next blog I’ll build some walls to make the actual room, and give it some personality.