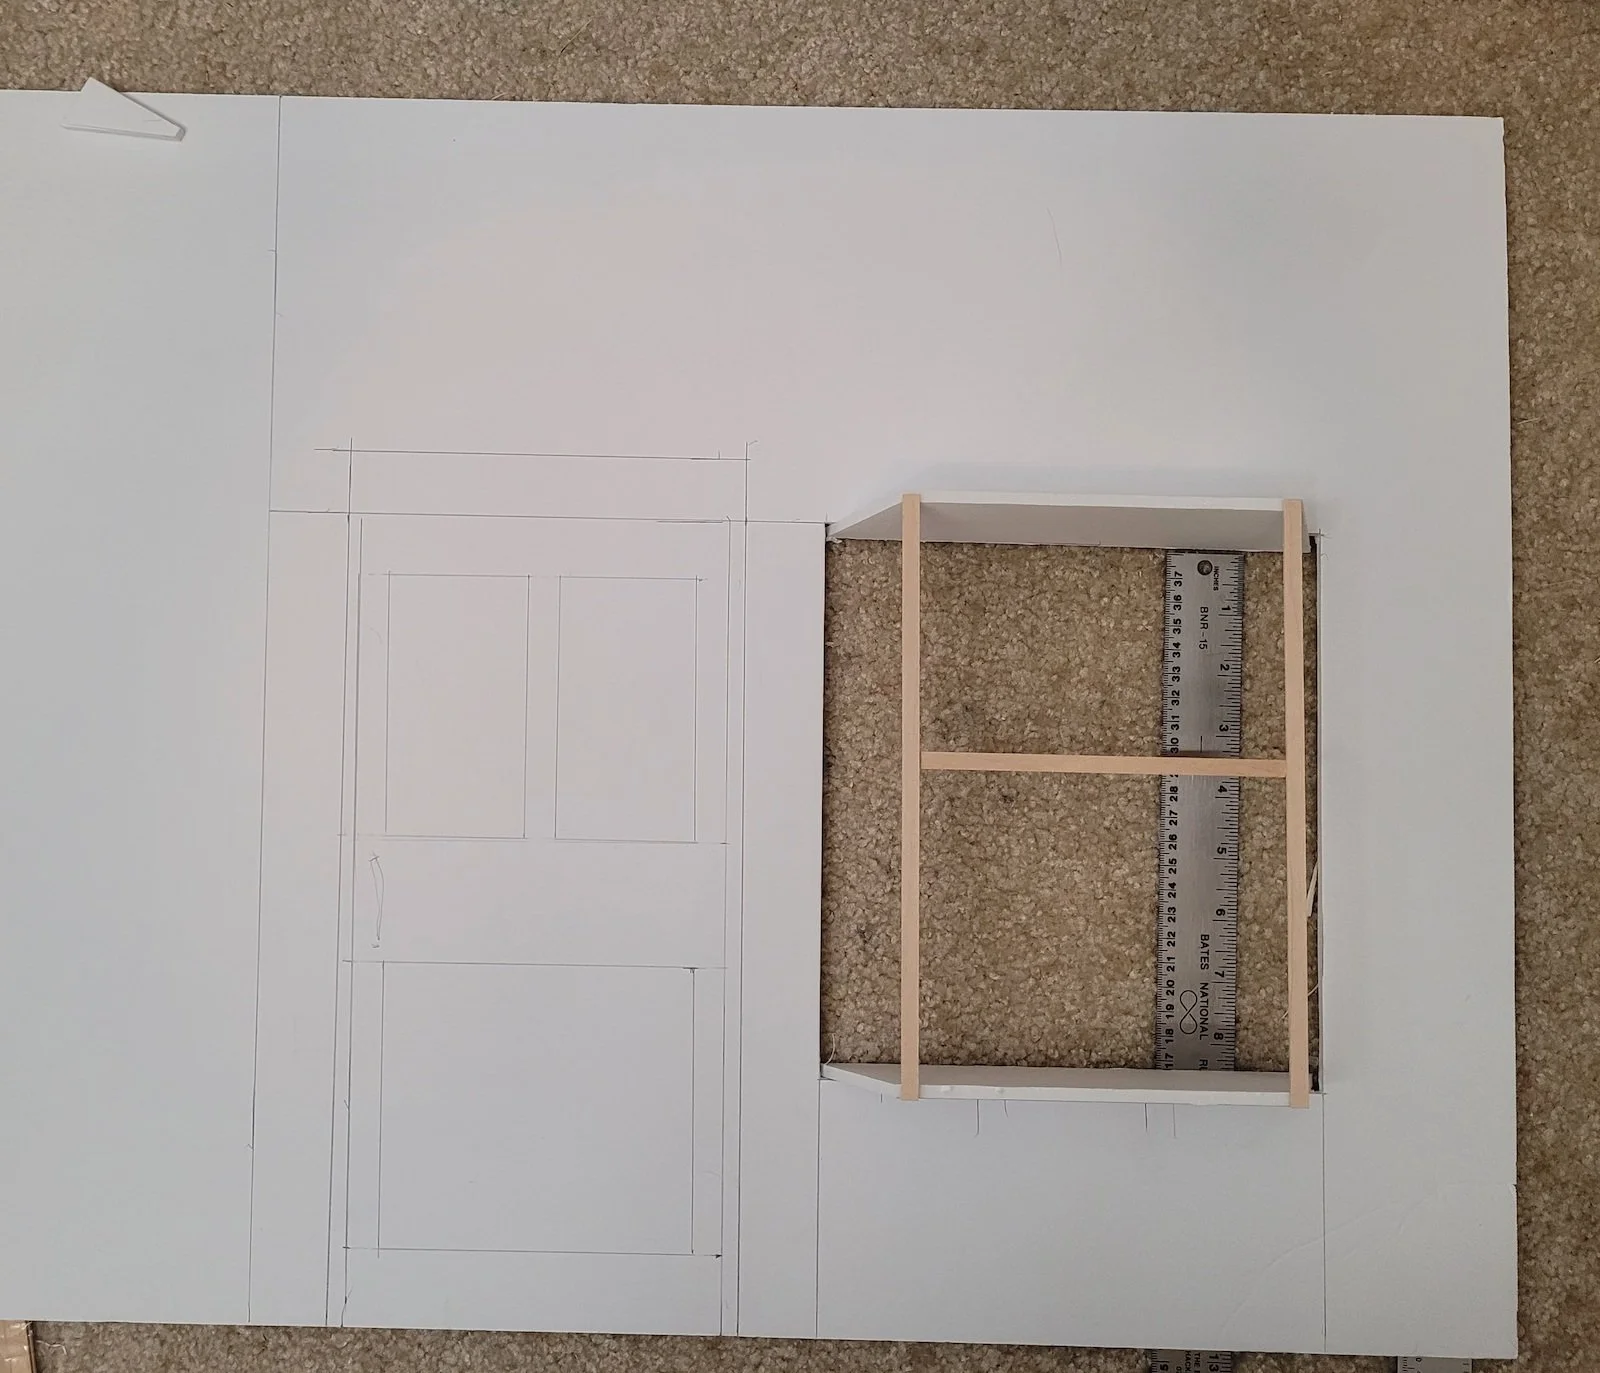
Having worked on the Apothecary Shop interior - now to making the shop front. For this I used a piece of foam board. I decided to go fancy and build out a bay window. This took a bit of measuring, gluing, and taping, and was a bit tricky for this mathematically challenged artist.


The door I created by cutting pieces of mat board into strips and rectangles. I made the mistake of using my mat cutter to get the nice angles on the panels - but I have paid for it dearly with a lot of pain in my hand ever since. I was a picture framer for many years and although I loved the job it was very hard on my hands. This was a reminder of why I gave up doing that.

When it came to creating the “glass” for the window, I discovered in my stash of art goodies an old packet of printable transparency sheets. If you can tell me why I have these you can win a wonderful prize - a packet of printable transparency sheets!;) Does anyone even remember what those were for - and who keeps this stuff for heaven’s sake? Lol! Not only have I never had an overhead projector, but I haven’t owned an inkjet printer for years either. Not a hoarder - honestly!!
Anyhoo - perfect glass - and easy to print Esmun’s logo onto!

I used some skinny pieces of painted basswood to make the window frame, gluing and taping them into place. I discovered that you can paint over masking tape very successfully and it doesn’t look too bad. (real dollhouse perfectionists would take issue with it, but as I’m making it to be photographed I can actually cheat and do some beautifying in Photoshop if necessary)

Now, what to do about the front wall of the shoppe? I didn’t want to have to make/paint bricks. I have had this pot of Garnet Gel among my paints for years and never had a use it for it. I tried it on a sample of foam core and et violà — stucco!

I spread the pinky garnet gel on the foam board with a palette knife. When it was dry I painted it with creamy beige acrylic paint.

Now it’s starting to look like something.
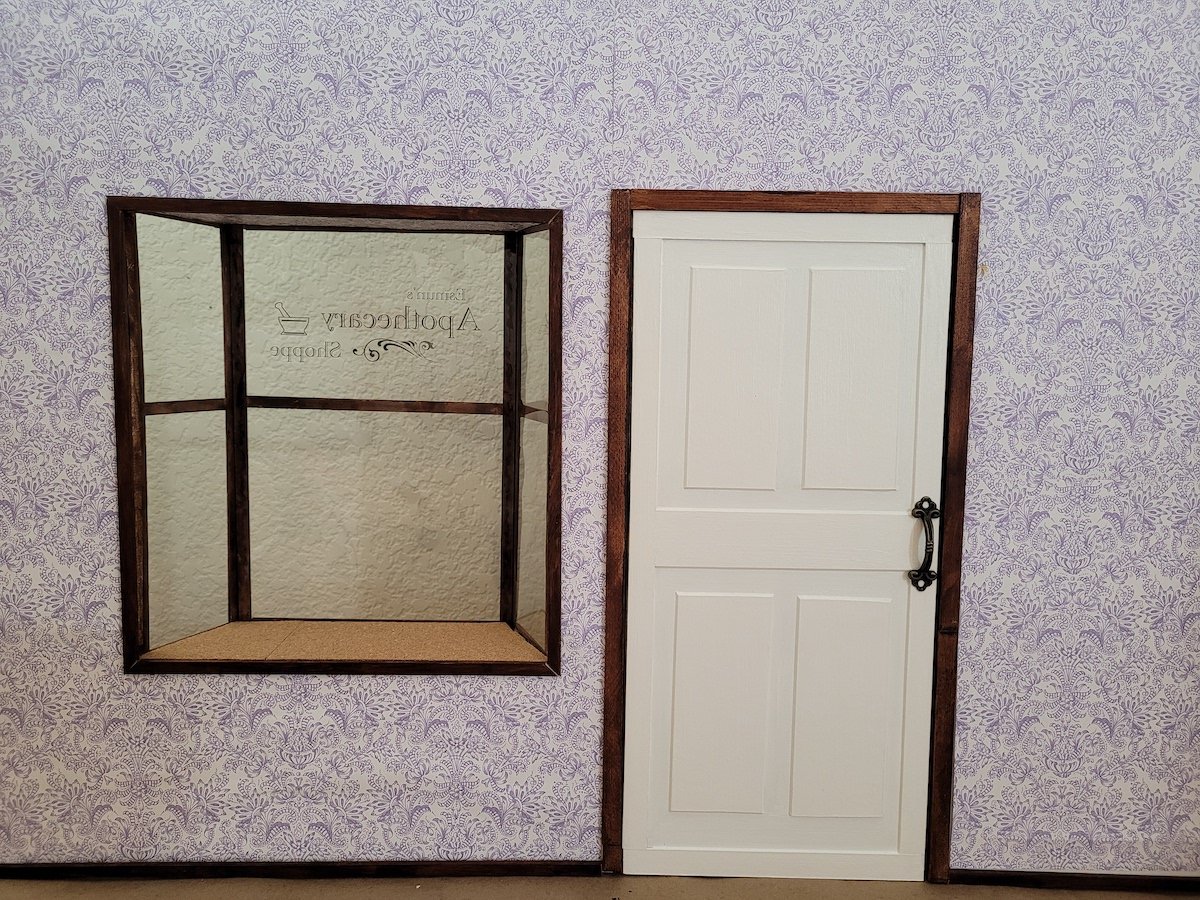
I also worked on the interior of the Shoppe frontage, creating the door on the inside and and framing out both the door and window. The door doesn’t open - it’s just for looks. The window ledge was covered in the same cork I used for the counter top. The wallpaper is a fancy pattern I found in 12 x 12 sheets at Hobby Lobby. The cute metal door handle is the same as the ones I used for the Apothecary chest of drawers. Having struggled with framing the door, I discovered we had some tiny saws and an old mitre cutter that I used for picture framing in a previous life, that meant I could cut the basswood in, somewhat, proper angles for the window. I think the Apothecary will be happy with it.

I had made a sign to just stick on the wall above the shop door, but then had the brilliant idea of making it a hanging sign. Off I went to my stash of metal and wood to create something….

I’ve tried bending jewelry wire into curves before - without much success,. This is not perfect, but I think it turned out ok. I used some fine 24g wire to hold the sections in place, stuck it to a piece of wood so that it would stand away from the wall, then painted it all black.

Hey presto - Shoppe sign hanging in the breeze! I added a few more bits of window frame to make it look more interesting. I should have put a ruler or something in there for scale, but it is 20 inches high and 24 inches wide. Now I have to figure out some pavement or something in front of the shoppe. The next blog post will be all about the making of my Apothecary guy, and a grand reveal of the splendid interior of the shop - watch this space!